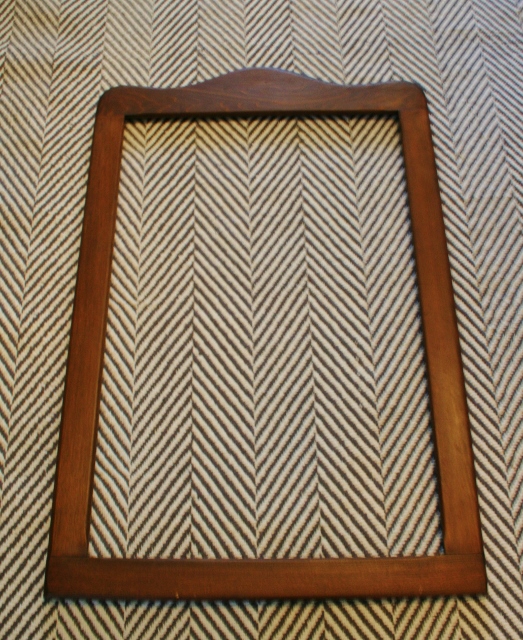
Ahh the memories, sweet memories. And where better to hold them than on a board? That’s what I thought at least. I have been itching to make my own memory board to put up in the Mego Cave near my desk so I can put inspiring words and pictures up there. Nothing beats having a little happy place to boost your spirits or your creativity. I knew I wanted to make a fabric covered memory board but the challenging part was finding the frame for the project. I have been scouring thrift stores all around the Burg trying to find one with a little bit of character. I finally found one recently at the last day of Estate Specialist being open. 🙁 Anyways, everything was 60% off and I walked away with this beauty for $8.
I loved her gentle curves and her wood grain. I was open to the idea of painting her, but I thought I would find the fabric next and see what the pair looked like together. Nothing says a hot date like JoAnn Fabrics on a Friday night, eh? (Although, delving into things personally here, it was prefaced by a pretty romantic night out at our favorite Indian restaurant. Me-ow). If you follow me on Instagram, you might have seen this picture.
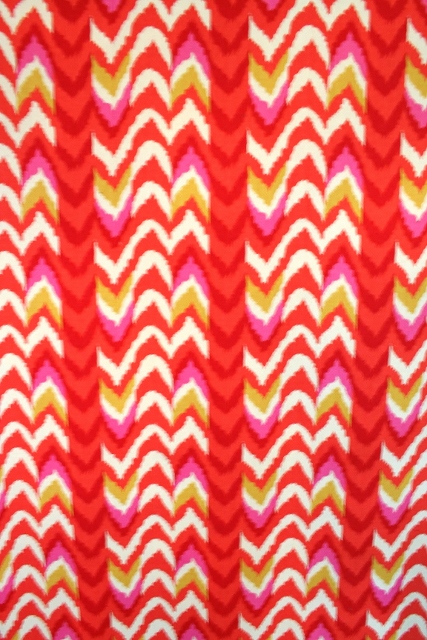
Oh fabric stores make my fingers itch to make something and get sewing…guess I really should learn how to sew a straight line better first. Thankfully, this project was a no sew dealio. After an extended period of time oogling fabrics, I walked out with a yard of this beauty.
BAM! Pink, red, and orange tones galore. Anyone who is surprised by my choice raise their hand. Mine’s raised. How about yours? Why am I surprised? Because it is not blue and green. Yes, yes, I was definitely glued to that section for quite a while but I pulled myself away. There are enough blue, green, and grey tones going on in the Mego Cave. I need a pop of color and some warm hues. I also just fell in love with this fabric immediately. A wise woman once told me (yes, you Mom) that if you just buy things that you absolutely love, they somehow all fit together. That advice has never failed me!
I had also bought some cork previously (don’t hate but Wal-Mart had the best price I saw for cork squares at about $6). I gathered my frame, cork, fabric, and some tape and was all set.
My frame had no back, so I had to make one. Thankfully my $1 foam board came to the rescue again (like it did for the china cabinet makeover). I just measured the inset on the back of the frame and cut it out of the foam board. I made sure to make it a snug fit.
Then I just laid the cork out on the foam board as a template. A few little snips and some adhesive squares later, my cork was ready for the fabric (after a quick check to make sure it all fit snugly in the frame still).
I then just wrapped the cork and foam board like a present, making sure the fabric was on straight and stretched tightly. I took the present idea literally and just taped the fabric on the back of the foam board. Then I took it one step farther – I secured the entire fabric covered cork foam board to the back of the frame with packing tape. My reasons were: I didn’t have duck tape, packing tape will be able to come off one day if I need it to, and this heavy duty frame might get marred when the tape comes off eventually but who cares? No one will see it in the back. So I really taped her well. She was all set to hang.
Shazam, how I like that pop of color. Gosh, I like her as straight artwork but it is a major plus that I can stick some inspiring pictures up there too. There’s not much up there yet. I didn’t want to force it but will wait until I have something I really want to put up there. I am sure you will see her evolution in future Mego Cave pictures.
What about you? Have you been making any memories (or boards) recently?


[…] ← Previous […]
[…] already revealed that one of the items that I bought was a lovely frame that I used to make my memo board. Crazy that this beautiful frame was a find that I happened upon in their deep, dank […]
[…] piece of fabric that would liven up the room more, perhaps bringing in some of the colors in the memory board. Then, my mom and I visited Ikea and plans changed, like they tend to do in that store with so many […]